Showing posts with label tops. Show all posts

Thursday 25 May 2017

Button Front Shirt with a Tie Front Twist - Burdastyle 11/2011 .


My  sewing has been very slow in the last month and in fact it feels like I am not achieving much of anything .
But I have finished  another project .
After finally completing my Knipmode challenge by sewing up at least one pattern from each magazine  I have turned towards my Burda magazines now.
I had about 6 unused Burda magazines and the idea was to get through those as well but something happened. Last month I went to a Melbourne op shop and I spotted a basket on the ground full of Burda magazines . I almost fell over myself in trying to get there before the man and child in front of me could steal them . Luckily they were not interested  in sewing magazines so I plonked myself down on the ground  , emptied the basket and started trying to work out which ones to get . After a little while I realised that was useless so I just lugged the magazines to the front counter and bought them ALL. Ahem , 31 of them .
Now they were old - ranging from the years 2000- 2006 but for 75 cents each I don`t think I would be the only crazy sewing female to get them ( would I ?? tell me I`m not nuts ) and there are some really good patterns in there that don`t look out of place for now and besides I am not exactly the most fashionable person around in case you hadn`t noticed.
So there goes my Burda Challenge because sewing a pattern each from 37 magazines might take a long time.

So back to the really important stuff - the shirt I just sewed.

I used  pattern 107  from November 2011 which has side pieces which tie at the front . I am seeing quite a few patterns around with this feature even now but I figured if I get sick of them I can unpick the side seams and remove those bits and just have a plain shirt . They really remind me of how we used to tie our jumpers around our waists at school . I went to two secondary high schools and at the government school no-one cared that we did that but at the private school we used to get told off by teachers and prefects so wearing this shirt makes me feel a little bit naughty . I am tempted to call this post Naughty School Girl Fashion or the Tie Me Up shirt but can imagine the creeps that might look that up !


I used some very old stash to use the shirt - a seersuckery striped cotton in beige with blues and greens and plums . The fabric looks much nicer in real life . The last couple of shirts I have sewn , I have made the sleeves first because I think these are the trickiest parts trying to sew the sleeve slit / bands well. It then feels like the rest goes quicker and easier. The shoulders on this shirt are wider than I would like but not an easy fix . After sewing the shirt I noticed that  it  looks wide on the models as well . It is also very long which is fair enough since Burda calls this a dress not actually a shirt . I did make the shortest version of all three variations ( but I have included a photo of the midi one not the short one ) .


Overall I like the pattern but I won`t be making it again ( hello  37 unused  Burdas and many more  unused envelope patterns  ) I wore the shirt today for Me Made May which I am participating in for the first time . So off to post this on instagram and also the facebook stashbusting group I am in ! 

Saturday 8 April 2017

Sabrina Slouchy Top.


I have been on a personal mission to use all my sewing magazines. This top pattern came from one called Sabrina that I bought in 2013 in Germany. I was totally amazed at the  vast number of sewing pattern magazines available at the train station we stopped at .


In the case of this pattern I think it is best shown by a floor shot !
It consists of a really over sized body with tiny armholes with attached narrow long bands . Hard to believe it is the same top when looked at like this.The only alteration I made to the pattern was to add 8 cms in length .It is hard to tell from the modeled photos but I hazarded a guess that the top was short.  I used up a remnant knit from my Issey Miyake maxi skirt I sewed in 2014 . To make this top work you need a drapey and very stretchy knit .I love the look of this knit - navy with fine silver threads but unfortunately it is cheap quality so already it is pilling and snagging.


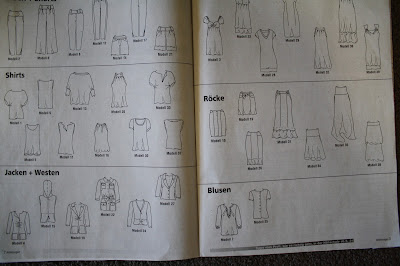
Sabrina magazine was a relatively cheap magazine compared to others I have bought - 5.5 euros so about AUS$7.50 . The magazine looks cheap too but lots of patterns are included. Get a look at the line drawings though ! I can only imagine whoever draws these are fulfilling their freestyle artistic fantasies. I did not find them completely helpful . I changed my mind on what pattern to sew from this magazine on the basis that I could not work out what was going on with both the line drawing and photo.   I rely heavily on the line drawings in making up clothes from foreign sewing mags. This one is in German and although I actually studied this language in high school and also relearning German using the duo lingo app ( according to my last assessment I was 7% proficient in German - how optimistic !) this didn`t help  much . I could find little about this magazine on the internet.

Sabrina magazine at the far right.  
The top was very easy to sew and  is comfortable enough to wear and for me a sure sign that something I have sewn is a success is when my youngest daughter said she wouldn`t mind having a top like this too. Overall I am happy with the result and I actually feel a bit trendy too .

Sunday 26 February 2017

Overthinking Sewing.


Sewing is my main form of relaxation and my only form of creativity ( unless you include 100+ different ways to use zucchini in Summer and pumpkin in Winter ) . Now thinking is of course very important but overthinking or rumination  is a whole different matter . I bought this small remnant piece of knit from the Clegs Remnant Xmas sale a few years ago thinking I could combine with another piece in my stash for a top  but the colours were way out . Then I tried to combine it with some other fabrics to make a pullover but the pattern was a wadder . Earlier this year after making my Burda pullover I thought I had the answer but there was not enough material . Garrghh! Enough ! There is only 70cm of this knit which is a light weight jumper ( sweater ) knit so I pulled out my trusty TNT Kwik Sew 2965 and just sewed it up before I overthought  any more .


And in another case of overthinking sewing I present my new skirt .


This red polka dot fabric is deep deep stash being left over from making a pinafore dress for my then 10 year old daughter ( 20 and a 2nd year medical student now ! ) . It must have been already quite old by the time I acquired it because it was only 90cms wide . It is a really good quality cotton with a smooth tight weave but it just positively screams Minnie Mouse so it has sat in stash all those years . I have thought and thought what to do with it from getting rid of it , to making a Minnie Mouse costume and to making something as unMinnie Mouse as possible. In the end I have made a `wearable` muslin of a knipmode skirt from May 2013.                                                                                                                                                              
   

A plain straight skirt with the front divided with a centre piece and narrower sides . I made the shorter version with cargo pockets .

One thing I don`t overthink with my blog are the pictures .I brush my hair , put on lippy and then convince someone to take pictures . The whole photo bit takes a few minutes . This time though took longer and I used several props to get photos .

Above my camera is resting on a bookshelf and magazines.
Camera propped on the back of a car with a turtle emerging from the ground .
Camera propped on the back of another car with an attractive compost bin in the background.
Up a ladder with the camera on a nappy bucket on the washing machine .
The best photos were the camera resting on the upside down old nappy bucket on the dining room table - must remember that one for future.
I have promised myself that I will wear this skirt for the remaining warm weather and if I still feel like a middle aged Minnie then the skirt will go.
Sometimes I feel a little bit crazy with how much time I think about these things but somehow if you are reading this blog then I know I am not alone .


Sunday 29 January 2017

Boho Tunic - Kwik Sew 3670


Late last year I fell in love with some navy chiffon printed with peacocks and attempted to sew a Kwik Sew tunic I have made once before. It was an utter dismal failure and I was ready to chuck in the towel . I have faced a few life challenges behind my smiley face photos and darn it if I am going to let a mere fabric and sewing pattern defeat me . In a previous blogpost I wrote about my win over the fabric.


So that was the chiffon fabric under control but I was unhappy that I had failed at making up the pattern which I successfully made before and loved ! Kwik Sew 3670.


So back to the stash cupboard . Mum gave me this boho print crinkled georgette ( there must have been about 5 metres ! ) and learning from my chiffon nightmare I gelatinised the georgette until it was almost crisp . I then very carefully pinned  the sides of the fabric together to match the wide patterned stripes . The pattern pieces were placed , pinned and cut like I performing some delicate surgery . I really was determined to  make this work. Well all that preparation was the hardest part because with the treated fabric it was relatively easy to sew up the tunic. This really is an interesting pattern with a rectangular extension of the front pattern piece gathered and then folded over the front yoke / sleeve part.


The only thing I am not quite happy with is the somewhat wobbly hem but if I try to level this out the black patterned stripe  at the bottom will look off so I would rather the wobbly hem. Obviously I did not quite have the fabric straight  when I was cutting it but I did manage to match the stripey pattern at the side really well but forgot to take a photo so you will just have to take my word for it.
Overall I  love the tunic - the patterns and colours and  the fact that I conquered the pattern as well . No more frustration at being bettered by fabric and pattern. I think this version will be as successful as my last one which came to  nasty end after a run in with a velcro vest .
Well January is obviously an energising sewing month for me because I have also completed a dress .
So until next time Happy Sewing everyone. Janine.

Sunday 1 January 2017

Knipmode White Patchwork Tunic .


Happy New Year ! I`m off to a flying start finishing off this white tunic and I have cut out two further projects as well.  All of which satisfy my own little resolutions / challenges which I set myself last year.
First off the tunic came about as a combination of using an old but unused knipmode magazine I have been mulling over for ages and my personal competition  to use up smaller scrappy pieces . I had a bingo moment when I realised this dress  pattern from October 2010  would be perfect for my remnant challenge as it is made up of several small pattern pieces. Win/win !


The dress has a front yoke , cuffed two piece sleeves and the lower front is divided into central and side front pieces with pockets . There is even a separate lower front . In other words the front of this dress has 8  pieces ! The back too has 6 pattern pieces so perfect for using small fabric scraps . There are no zips or other closures in this dress.
I used a total of 4 different white fabrics . The front yoke and front side pieces are made of dotted swiss cotton. The back and lower centre front is made of a pintucked , lacey cotton and the sleeves are constructed from  a self patterned white paisley design. The facings uses a self checked cotton. All fabrics were remnants from long ago projects but  just too good or sentimental to throw away.


I made a few  alterations to the pattern , the main one being that I did not make the dress  but left off the lower front/ back pieces and made a tunic length garment . The front slit was quite low so I stitched this up another inch but the tunic is still quite easy to put on .  I also deleted the pockets concealed between the side and central fronts but this is a nice little detail in the original design.  Finally I elongated  the front yoke facing piece to be same length as the front yoke because the dotted swiss is quite see through and a shorter facing shadow would have annoyed me. Otherwise as per usual the knipmode pattern is well drafted and all the pieces went together well. I used a kwik sew pattern to help me with the sleeve vents and this was the hardest part of the whole project. 
Overall I am very happy with my new tunic - a great way to start the sewing year. I extend my wishes for everyone to have another safe and healthy and happy 2017 . 
Happy Sewing Janine. 

Thursday 22 December 2016

Blue Tops ( and Lots of Them ) .

Dear Blog Diary , I have been very busy but I have been thinking of you . I have been working and travelling lots . I flew to Townsville and then drove 3500kms back home . Then we drove to Merimbula for a short but sweet holiday. On the way back  I stopped at Bairnsdale and then cycled to Paynesville . A short ferry trip across to Raymond Island to see the koalas and then a train trip back home and to real life ( ie work ) . However real life includes sewing and even the occasional blogging so all is good. Before I went away I sewed blue tops and lots of them for literally every female in the family .

 DD 1 Blue Top.
My eldest DD just happens to live only about 10 minutes ( if the traffic is good ) away from Darn Cheap Fabrics  in Heidelberg . We went there for a bit of a cheer me up session and she really liked this stripey , diamondy fabric . She has a very favourite oversized top which is also very stained and pilled and wanted it recreated .
No problem at all ! A very easy sew as I was able to unpick the original top to copy. I have previously tried rubbing off an intact garment to make pattern pieces but found it quite tricky .

DD3 Blue Top

Well I overestimated the amount of fabric needed for DD1 top and DD3 loved the fabric too . There was just enough to cut out a top from the Burda April 2016 issue . This is a easy fitting top with dropped shoulders . All the vavoom is in the back with a V back and a little strap going across . Also a very simple sew but I ignored Burda`s instruction to add a snap to the strap at the back . I can see no purpose for it as the top easily fits over her head . DD1 and DD3 are very similar in appearance and in many other ways ( they both dislike bananas for example - weird !) so now they can be real twinsy wearing their stripey tops.

DD2 Blue top.
I have been unable to pin down DD2 for a pic. I made the same pattern as for DD3 using the silk I used to make my kimono jacket bands. So a plain blue top basically. But lovely nonetheless .

Me !

I bought this exotic peacock chiffon from the op shop . There was something like almost 4 metres of the stuff. I started sewing up a Kwik Sew tunic pattern but I hated it . Not the pattern , nor the fabric just the combination. The chiffon is a see through and slippery customer indeed . I hated the see through seams  and the crooked hems and the fraying sleeves . I was ready to chuck this big time but then thought NO . It is just fabric and I will not let it defeat me. So I soaked the chiffon in a gelatine mixture  ( I originally just used starch ) and since the Burda April issue was lying around traced and cut out a really simple little shell top. The only features of the top which are totally obscured are some darts at the neckline. I lined the top with self fabric but as you can see it is still quite transparent. However I have ended up with something quite wearable - a little shell top and it only took 4 metres ! I have sworn off chiffon for a bit now but expect it will be like childbirth .
I usually like to add pictures of the patterns I have sewn because personally I find this very helpful when reading blogs . But I lent the magazine to a friend who wants to make a tunic and a dress for her sister . It really is a terrific issue.
So Blog Diary I am glad to caught up with my sewy news . Hope to report back again soon.

Thursday 27 October 2016

Kwik Sew 3658 - A Miracle In Pattern Drafting .


My sewing output is much greater than my sewing blogging as I made this top early this month .
I was so impressed by this pattern I wanted to include a few pictures showing how it was made .


This is the two front pieces placed right sides together and stitched at the top and along the middle .


The fronts are ` opened up ` .


This creates a self front facing which is basted down .


The back is then stitched to the front . After this all that has to be done is sew the sleeves in the flat and then sew up the side seams and do the hems. So quick and easy and just amazing  ! Mind you I have no drafting skills so I might be easily impressed .


The close ups of the front and back neck line also show up my fabric well - a white waffly knit . It was only $1.00 from the op shop but it was covered with lots of little black dots which I did not realise until I had taken the fabric home. Luckily they washed out with a bit of that wonder pink napisan .
I am overall happy with the top but the neck line is a bit floppy and the shoulders too wide. Otherwise it really is a little miracle in pattern drafting.  I know Kwik Sew is not so popular or trendy so I do appreciate that they have reliable drafting and excellent instructions which is what really counts in the end.
Happy Sewing Janine.


Thursday 22 September 2016

Simplicity 1280 - A Surprise Winner.


This is my favourite sewing out of my recent projects. It is the cross over top from Simplicity 1280 which is a very popular pattern for good reasons as I have discovered.
I was hesitant about this style because I carry most of my extra fluff around my lower tummy and thought this cross over elasticized top might emphasize it. But I really liked the versions I have seen so gave it a shot anyway.
I used a piece of chiffon which has been hanging around close to a decade 😳 . The pattern says you need 1.4 metres  of 1.5 metre wide fabric but I only had 1.25 so I was really happy when I managed to not only squeeze out the  top with this but also lengthened the sleeves to reach my wrists.
The  other change I made was instead of adding elastic to the sleeve hems I made bias binding strips the same width as the neck band to finish off the sleeves. Personally I find this more comfortable than elasticized sleeves but that could be because I cut the elastic too short.

As others have noted it really is a modest top with the deep cross over pieces. It is very easy to sew but you do  need a soft drapey fabric for it to work. The chiffon was perfect for this. I did not sew any extra stitches to secure the fronts because I think that kind of changes the way they fall and I did not find it necessary.  I highly recommend this pattern and also want to try out the other style top included in the pattern.I have included what is a totally useless hanger shot where all details are obscured by the print !


Happy Sewing Janine.

Wednesday 14 September 2016

Burda Style Vs Ottobre Design.


Burda skirt , Ottobre top . In real life I will not tuck in the tops .  

I have just recently finished sewing a skirt from Burda Style and a top from Ottobre Design and it was interesting for me to note some differences between the two European sewing magazines .

First up the skirt is from Burda Style September 2012 ( the same one I made my pinafore from ) .
It is a slightly A line skirt with a single inverted front pleat . It does not  have a waist band, is fully lined and has a side zip . There are only two pattern pieces !
The back story to sewing this skirt is a family trip to see our daughter in Queensland. We were standing waiting to board the plane and my eldest and youngest daughter were discussing my clothes - I was wearing an old denim skirt and even older knit top . A lady just in front must have been listening as she turned around looked me  up and down and smiled but in a nice way as she caught my eye . That is when I realised I was being talked about and heard what they were saying . I admit I was feeling pretty frumpy in that skirt so I pledged to make a new denim skirt . I have had the material for yonks - it looks like denim but is not .

 It is so easy to make but I made a change by not lining the skirt and finishing off the waist band with grosgrain - after all who wears a lined denim skirt ! I also added a button tab to top . In the end though my pretend denim skirt is a little scratchy so I may need to wear a petticoat with it ! The upside is that this fabric ironed like a dream - that pleat came up really nice and sharp and sewed easily.


Now the Ottobre top. This the the ` Kimono ` top from the Spring/Summer 2016 Issue. The magazine was for sale at a local newsagent and as I have never seen one before I couldn`t resist buying it. It is another simple garment to make just  having two main pieces and bias binding strips to finish the neck and armholes. It has slightly dropped shoulders , flared sides and front darts. 


I cut the fabric for the top out on a Friday night and sewed it up the next day . It has been a long time since I sewed anything in one day but again the top was so easy to make. The fabric was given to me by my eldest daughter after her travels to Japan 4 years ago. 

Now the comparison between the magazines . The burda patterns are easier to trace as the different sizes have different dots/ dashes to distinguish them. The ottobre patterns are all the same coloured solid lines . There were places where it took me a while to work out where to trace the top . Ottobre does include hem allowances but not side seam allowances . The bias binding pieces including all seam allowances were also printed out. Burda does not include any hem or seam allowances and you have to make your own pattern pieces for simple rectangles etc. 
The instructions for the ottobre top were very clear and easy whereas sometimes Burda instructions can be a bit goobledygook. 
The Ottobre magazine cost me $22.50 compared to Burda Style ( I bought one of those too on the same day ) which was $17.50 . There are more designs in the Burda and the patterns in Ottobre seemed quite basic . Lots of basic shift dresses which I already have patterns for .I did like another peplum type top in the Ottobre , a pleated dress/jumpsuit and some pants . There was also a useful T shirt which I will make up some day. 
Overall I prefer the Burda and  will need a bit convincing to buy another Ottobre magazine . 

Lastly I would like to thank my photography assistants for today - the supervisor and the photographer`s socks.