Showing posts with label knipmode. Show all posts

Tuesday 2 September 2014

Japanese Cotton Sewing - Kwik Sew 3026 and Knipmode May 2012.

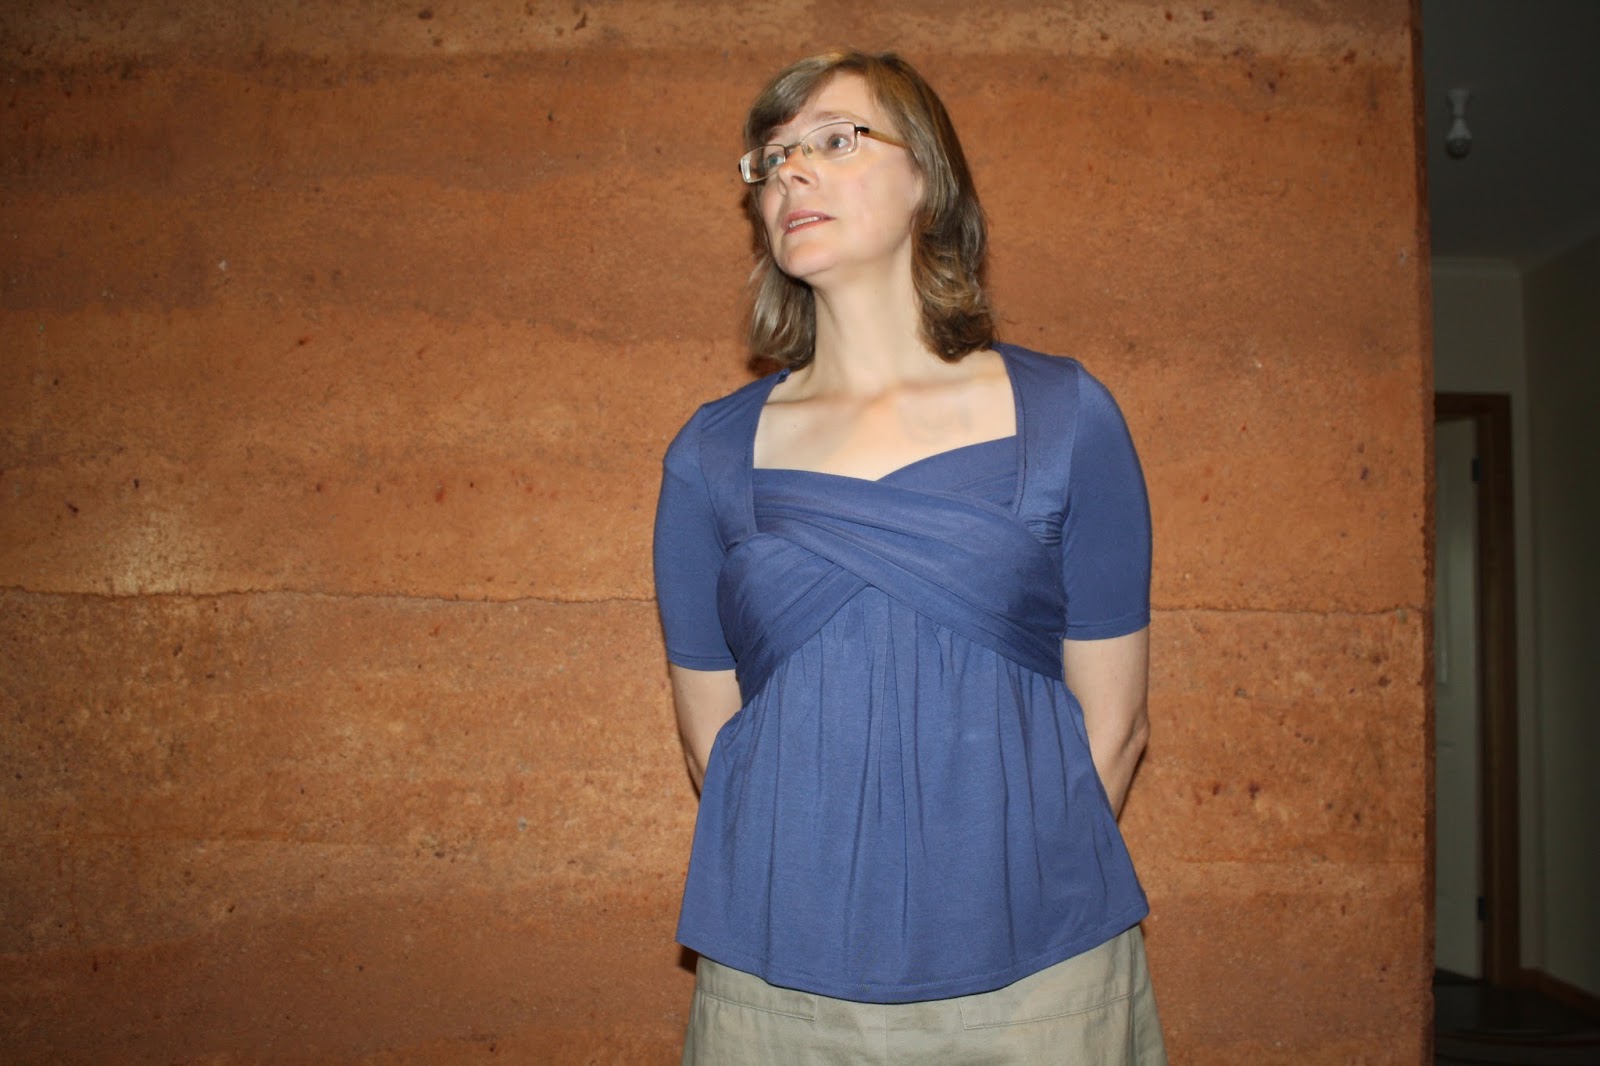
I added sleeve tabs so I can the wear the top with sleeves up or down. 

Last year my eldest daughter took a gap year after finishing secondary school  and travelled to Japan for several months , came home for 4 days and then took off again to Peru ( talk about how to cause your mother a heart attack  ! )
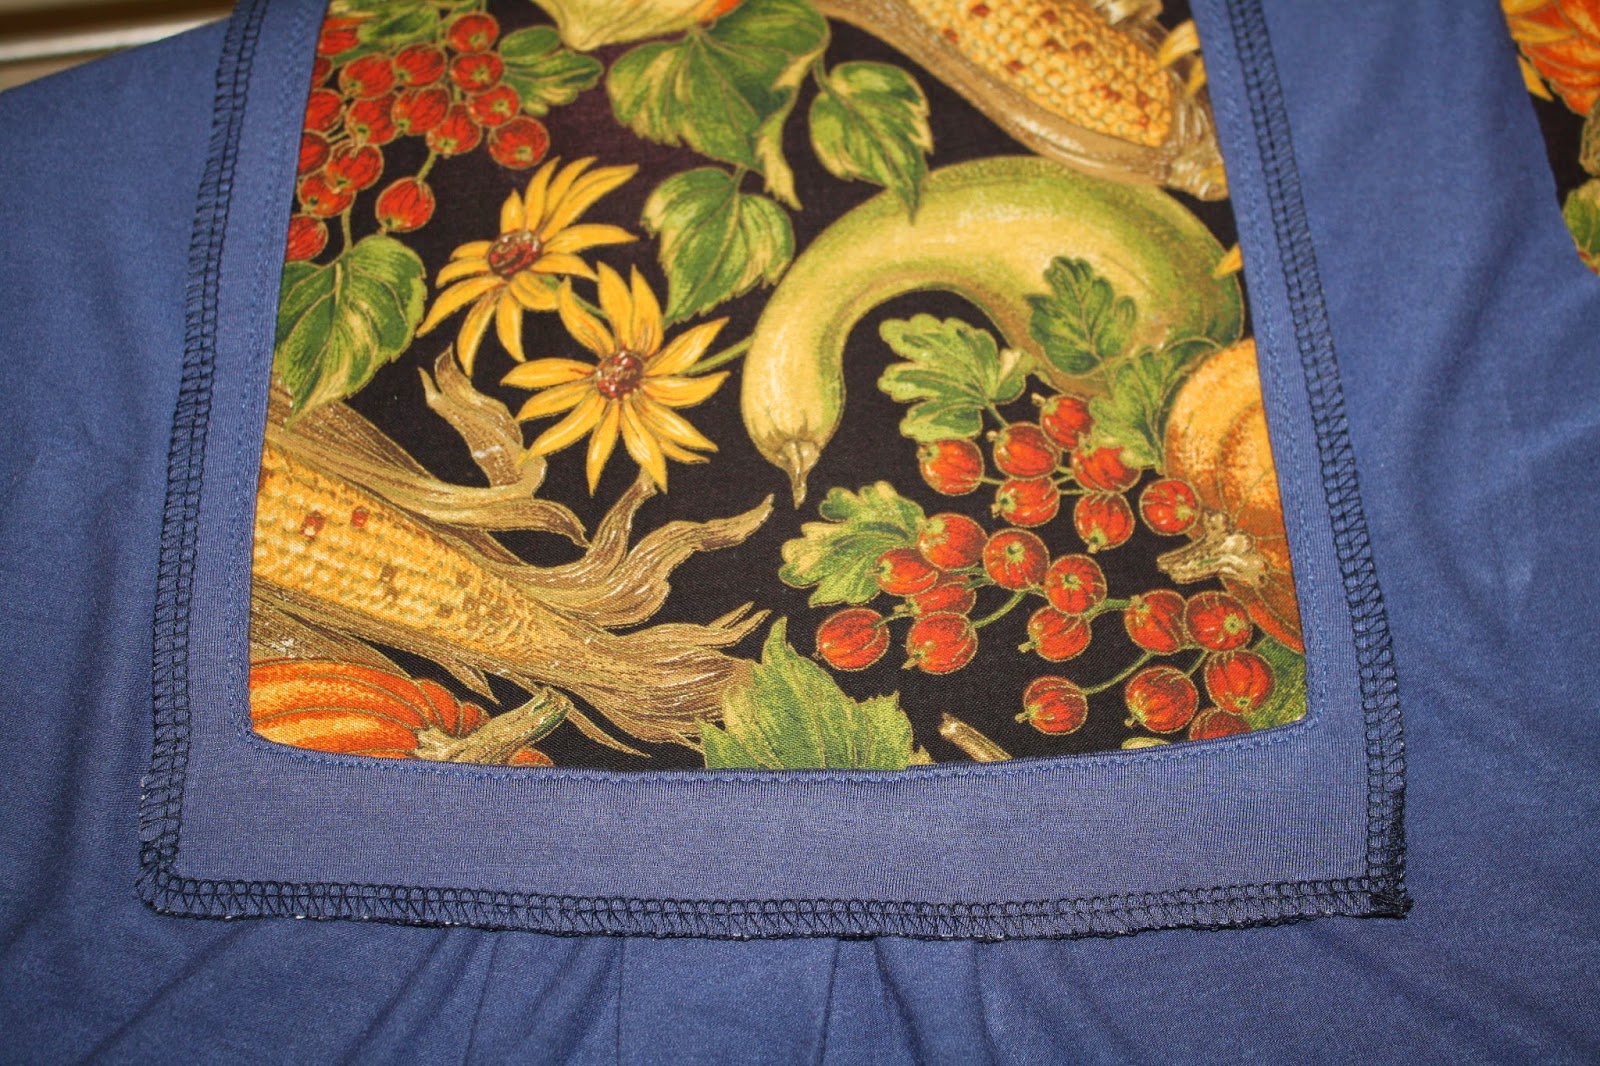
Anyway three years prior to that she spent three months in Tokyo on a school exchange and I muttered something about Japanese cottons . Her host mother took her shopping and  she  came home with the most lovely softest piece with a divine pattern. My DD told me how hard it was to choose because the cboices were overwhelming but I think she did a fantastic  job. This fabric went into my very special fabrics section . I wanted to sew the perfect garment that I would have for years and years  and not waste it.
Three years later and my daughter is about to go to Japan again and she mutters something about  me not having sewn up this fabric and how she wouldn`t get anymore for me . Umm was that a threat ?
 Quicker than you can say Japanese fabric I pulled it out and cut out Kwik Sew 3026 view B -a  pullover  basic shirt pattern with collar and stand, back yoke and front tab. I have made this pattern four times now so I knew it was a winner and being a basic style I would have it for the years and years that I wanted.


Obviously all went well with my daughters travels overseas and she did buy me more Japanese cotton - quite a lot actually .

Wanting to show my appreciation I sewed up one the fabrics straight away ( although eldest DD had already left at this point so she couldnt see it !) As a compromise I chose my least favourite and used a knipmode pattern from May 2012 to sew a simple yoked tunic with tabs on the lower sleeves and body .


Then while our daughter was in Peru ( Cusco and Manu National Park in the amazon ) her host brothers from Japan whom she stayed with in 2010 came to visit for one week  and they brought some more Japanese cotton for me ! That was a very interesting week because one of the brothers did not speak English and the other was learning ( and doing a great and very fast job ) and we do not speak Japanese ! Our eldest daughter is quite fluent but we got by without her and had lots of fun.

I have since used some of my Japanese cotton stash to make the lace and floral top for eldest DD which is only fair!
So I am very lucky to have a small stash of lovely Japanese fabrics  which I have again put away in my mind to be used only for the perfect project.

PS - I actually sewed this shirt last year just to clear up any confusion on time lines.
PPS - My youngest daughter is thinking about going to Japan on a school exchange so I may have to start muttering again about how lovely and special Japanese fabric is and how much I treasure it.

Saturday 11 January 2014

The T-Shirt Project -Part 3 . The Cross Your Heart KnipMode T .

KnipMode Feb 2012 - pattern  27.

This is by far the best of a bad bunch of photos . My photographer charges by the nanosecond so you have to be quick. But it is clear and does show off the style lines of the T shirt ( and my double chin ).
When I set out to replace my sad Tshirts  I wanted to try sew something different to what you can buy and to what I already have (  which are basically large and boxy and shapeless ) .
I also wanted to actually use some of my knipmode magazines rather than just look at them  so I found this pattern in the  February 2012 issue. It was actually a dress (jurk) pattern but certainly different to anything I have and a bit of a challenge as well .
In my stash I have some remainder of a mid blue soft , fine , drapey knit which is what this design needs . Anything too firm or beefy and the pleats and gathered cross over pieces would not work.


 This T shirt was a challenge though . I started this in late November and finished on about the last day of December last year . I procrastinated at different points and went and did some xmas pressie sewing ( aprons ) and then later the easiest thing in the world to sew , new short PJs , for my newly arrived back at home from 9 months OS eldest DD ) . I have previously used google translate with my first Knipmode make but it is sooo slooow and the translations do not always make sense anyway and this  make  seemed to have a lot of instructions. So I just sewed intuitively and it worked out . I have to say Knipmode has very clear fabric  layouts which was incredibly helpful and the patterns are much easier to  trace out than  Burda because they have fewer patterns per sheet and nice thick differently coloured lines  .

 
So I started  by making the pleats along the square neckline which are clearly  marked so you don`t need to read Dutch to work this out. Then I added the square facing as seen as above ( but I later overlocked over the wider horizontal part to even out the facing width. There was a rather um interesting discussion on Stitches and Seams about knit facings and also what stitches to use on knits . I have never used a facing on a knit top before but could not see what the alternative was with this unusual neckline. Anyway this all turned out well.


The next step was to gather the shaped cross over pieces , turn under the wide facings along the long edges ( after overlocking them )and attach them to the sides and armscyes . This was the point that confused me because I actually thought they might attach along the neck line but in the end I worked it out ( and actually got my xmas sewing done - so all`s well that ends well ). After this the sewing was easy. I attached the narrow binding strip to finish off the back neckline , sewed the back and front together , attached the sleeves and then sewed the sleeve and side seams in one go. However the neckline facing kept on flipping out as it is in their job description to do so I tempted fate and stitched them down using a lightning stitch. I used a slight zigzag for the  rest of the seams and overlocked  the edges because I find with time that straight stitches tend to break.

Despite my expression on the photo I am happy with the finished top . What can I say but this top is great for us ladies who get high marks in the bust department ( if you know what I mean ) and the gentle pleats in the front make it quite comfy.  Once I adjust the cross over pieces after putting on the T they generally stay put( they are only attached at the sides , not on the neckline) . They do not feel binding like the photo suggests. The sleeves are firm fitting but not uncomfortable because the knit is soft and stretchy. I did elevate the neckline by an inch but apart from shortening the pattern from a dress to a top I did not alter the pattern.

And thus concludes my T shirt Project for now. Ciao !

Sunday 20 January 2013

Knipmode - The $2.50 Op Shop Michael Kors Skirt


Michael Kors would be rolling around in his  NY penthouse suite or Monaco Yacht or where-ever he hangs out to think us sewists could make up one of his skirts for only $2.50 but isn`t that one of the reasons we sew ? 

Sewing this skirt ticks lots of boxes for me .
1.  I finally got to use of of my Knipmode magazines. This skirt pattern comes from the supplement to May 2012 `s edition. The supplement was only for skirt designs. 
2. I used an old stash fabric - this has been maturing for at least 6 years . It is a turquoise light weight linen . It was so easy to sew with and the colour alone made me feel good . And it was only $2.50 .  Luckily I still have a remnant leftover  .
3.I finally got to try out bound buttonholes and mitred hem corners . 

The skirt is unusual but simple in design - It has a slanted side on the left to  which is attached a long rectangle . Then buttons are added to this same side to create the unstructed pleats. 


My first bound buttonholes . The buttons are sewn on the inside of the skirt.
Knipmodes are dutch sewing magazines . For any Australian readers who are interested I bought mine from Crafty Mamas and as a bonus there is free postage .  I  started to use google translate but it is quite a slow process. I did a little research to find that like other pattern magazines there are no seam or hem allowances. 
After that I sewed the skirt by instinct because it really is a simple skirt. 
The steps I followed are -
1. stitch darts in the front and back. 
2. sewed up the back skirt pieces . 
3. added the zip. 
4. sewed the front and back skirt pieces together. 
5. sewed the front and back waist facing pieces together ( after interfacing them ) 
5. sewed this to the skirt then trimmed , snipped and understitched  the facing. 
6. added a bias binding trim to the waist facing and handstitched this to the zip area. 
7. measured out my rectangle piece needed and attached this to the skirt front and back. 
8. sewed the hems (  by hand except the mitred corners ) 
8. made bound buttonholes and attached the buttons.
  
Now why was this skirt only $2.50 ? 
Well the fabric was only $2.50 from the opshop and I only used about three quarters of it so say $1.70. 
The buttons were also from the op-shop - $0.50 and finally the zip  came from the op-shop as well  - they were three for one dollar so about $0.30 . ( I did try to buy a zip new but there were no zips that even came close to the colour of my skirt . I walked a few doors down to the oppie  and found a really close match and it was Australian made !) 

Finally channelling my inner Angelina Jolie ( and by inner I  mean really really inner. ) 

Cheers Janine. 
PS Jane I tried to find another photo of this skirt but all I have is  the photo from the magazine.