My next post is about two tops I made from the completely different end of the spectrum.
First up Vogue 1309 an Issey Miyake pattern from 2012 which is classified advanced . This is the first time I have ever sewn an advanced pattern . I had read the reviews prior to making this and to say I was intimidated is an understatement. I got there in the end but it was not all smooth sailing.
 |
| Vogue 1309 front . |
I used fabric from my neighbour ( who I mentioned in my last post and showed pictures of her latest kind donations ) . The pictures do not show up the richness of the colours in this fabric but if you think of magnificent peacock hues then that would come close. I am pretty sure this fabric dates from the 90s being a shiny polyester but I love the abstract pattern and colours and I am happy with how it suited this pattern.
 |
| vogue 1309 back . |
This pattern is incredibly clever and it starts with just three rectangles ( and bias binding ) so you think how can this be advanced as the cutting out is the easiest thing ever . Then you cut a slash down the centre of the largest rectangle and then the fun begins . Well it was fun to begin with as I thought I was doing OK . But as I got to the end I thought I have mucked up somewhere as nothing was making sense.
 |
| vogue left side with zip |
I must have twisted one of the shoulders around so I unpicked a couple of seams and luckily was able to untwist the whole mess . Then it all made sense and I was able to finish the top. At one point I was feeling quite the failure that I could not get it right and was lamenting the potential loss of a lovely fabric .
 |
| Vogue 1309 right side |
As everyone else has said in their reviews it is absolutely essential to carefully mark all the circles and squares on the pattern . I used coloured numbered dots and even wrote the colours and numbers on a separate piece of paper to keep track of it all and this helped me.
I did not use bias binding as recommended on the pattern to the inner slash but over locked it and I also over locked all the outer edges of the rectangles . On the pattern the outer rectangles are left unfinished and I don`t know of too many wovens that would not fray in time .
When I finished the top I noticed that it felt quite tight on the left side but the right shoulder strap area was loose and in danger of falling down and revealing more than I would like. So I unpicked along the left side of the top with the long middle sized rectangle until it felt comfortable and added in a wedge of fabric here. On the right shoulder I tacked it down to the underlying fabric so hopefully I won`t do any inadvertent public flashing. There were also places where the overlocking stitch could be seen externally so I made narrow hems on the machine there. The pattern recommends an open ended zip but since I didn`t have one of those that matched I just used a regular zip and there were no issues in doing so .
I am glad I made this pattern successfully ( eventually ) . It really is like the sewing version of Twister and you need your wits about you and your eyes by the way ( the lettered circles and squares are small and faint ). I look forward to wearing this on an evening out.
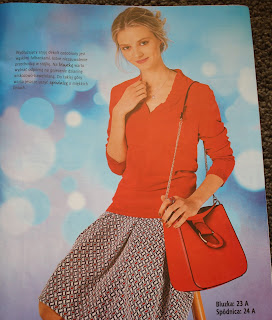
So top two . The just about easiest ever T shirt made from Burda Easy January 2018 edition which is also my first ever Burda Easy project . My daughter bought me the magazine when she was in Europe and this version is in Polish . I know absolutely no Polish although my paternal grandmother`s family immigrated to Australia in the 1830s from Prussia ( which is where Poland now is ) as a useless aside for anyone to know.


The front is a slight scoop and the back is V shaped but it is not a deep V so it can be worn with the V in front as a bonus. I used a white ribbed cotton interlock with a small mauve floral but since I see this as nightwear fabric this top is relegated for PJs only . This is a really useful little pattern and and I will make it again .Burda Easy is unlike the usual Burda Style magazine. There are not so many styles in each edition but the patterns are printed separated on tissue paper like your usual envelope patterns so need to go cross eyed tracing tangled messes of lines. There are also clear step by step construction diagrams .
I am happy with the end result of both projects. Next up more tops !


