Saturday 11 January 2014

The T-Shirt Project -Part 3 . The Cross Your Heart KnipMode T .

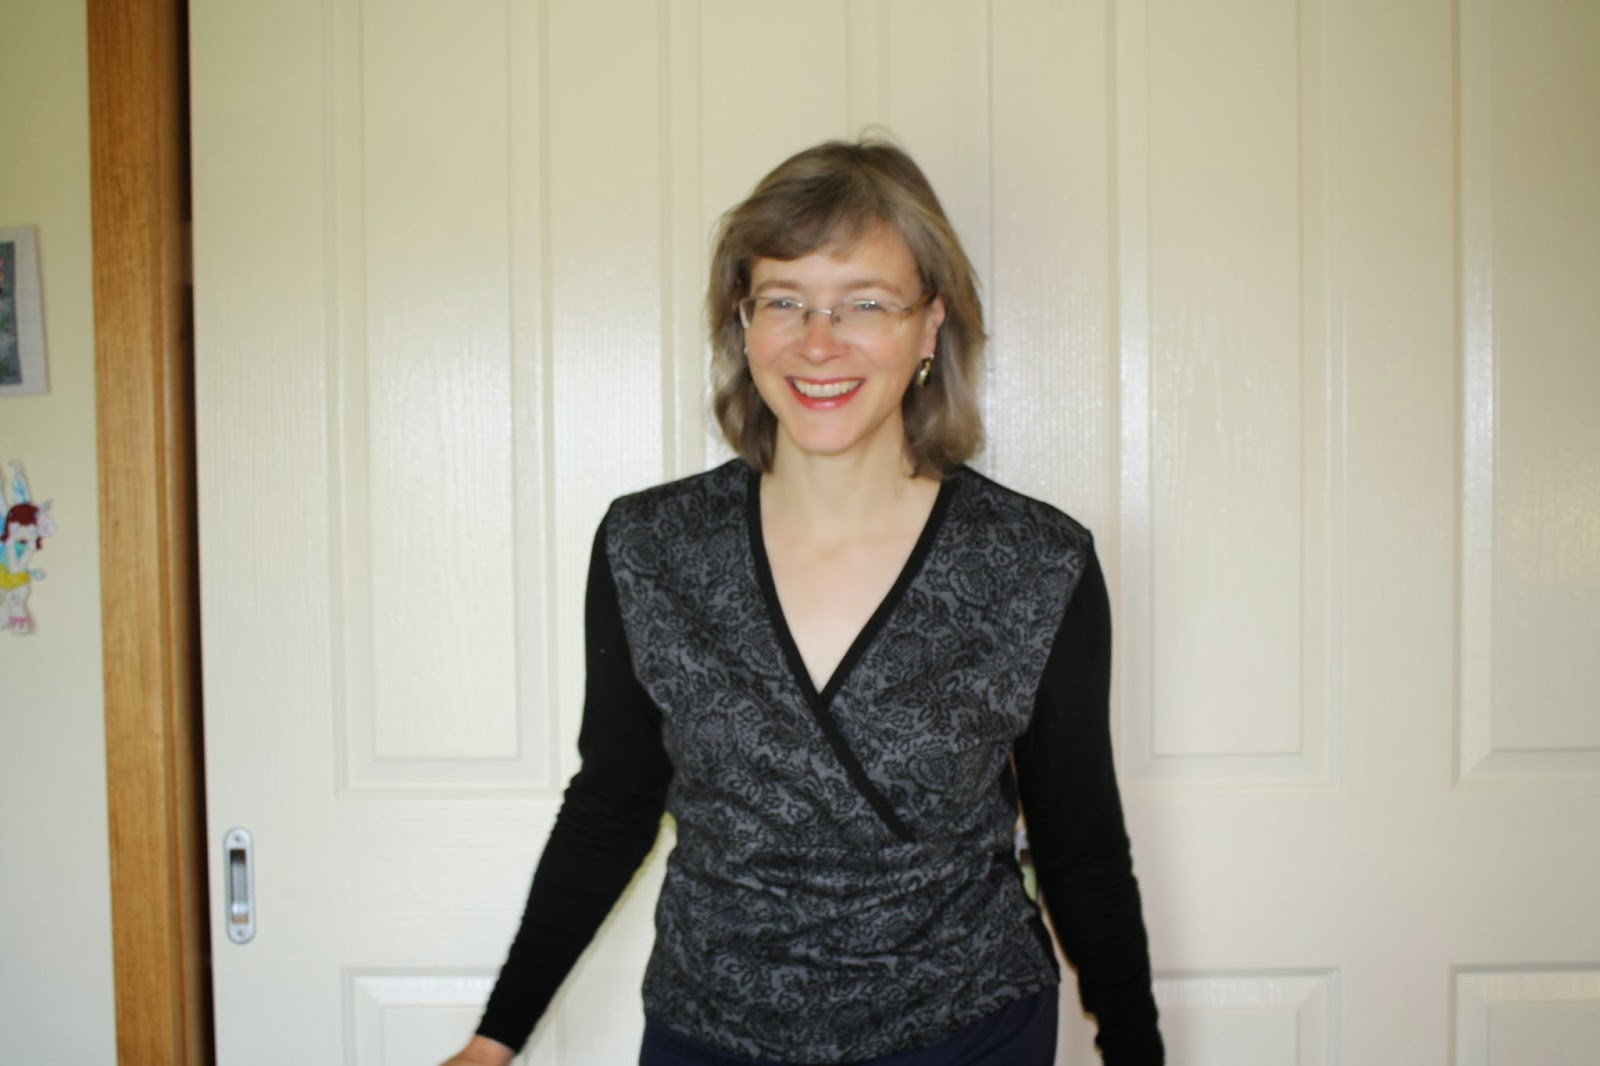
KnipMode Feb 2012 - pattern  27.

This is by far the best of a bad bunch of photos . My photographer charges by the nanosecond so you have to be quick. But it is clear and does show off the style lines of the T shirt ( and my double chin ).
When I set out to replace my sad Tshirts  I wanted to try sew something different to what you can buy and to what I already have (  which are basically large and boxy and shapeless ) .
I also wanted to actually use some of my knipmode magazines rather than just look at them  so I found this pattern in the  February 2012 issue. It was actually a dress (jurk) pattern but certainly different to anything I have and a bit of a challenge as well .
In my stash I have some remainder of a mid blue soft , fine , drapey knit which is what this design needs . Anything too firm or beefy and the pleats and gathered cross over pieces would not work.


 This T shirt was a challenge though . I started this in late November and finished on about the last day of December last year . I procrastinated at different points and went and did some xmas pressie sewing ( aprons ) and then later the easiest thing in the world to sew , new short PJs , for my newly arrived back at home from 9 months OS eldest DD ) . I have previously used google translate with my first Knipmode make but it is sooo slooow and the translations do not always make sense anyway and this  make  seemed to have a lot of instructions. So I just sewed intuitively and it worked out . I have to say Knipmode has very clear fabric  layouts which was incredibly helpful and the patterns are much easier to  trace out than  Burda because they have fewer patterns per sheet and nice thick differently coloured lines  .

 
So I started  by making the pleats along the square neckline which are clearly  marked so you don`t need to read Dutch to work this out. Then I added the square facing as seen as above ( but I later overlocked over the wider horizontal part to even out the facing width. There was a rather um interesting discussion on Stitches and Seams about knit facings and also what stitches to use on knits . I have never used a facing on a knit top before but could not see what the alternative was with this unusual neckline. Anyway this all turned out well.


The next step was to gather the shaped cross over pieces , turn under the wide facings along the long edges ( after overlocking them )and attach them to the sides and armscyes . This was the point that confused me because I actually thought they might attach along the neck line but in the end I worked it out ( and actually got my xmas sewing done - so all`s well that ends well ). After this the sewing was easy. I attached the narrow binding strip to finish off the back neckline , sewed the back and front together , attached the sleeves and then sewed the sleeve and side seams in one go. However the neckline facing kept on flipping out as it is in their job description to do so I tempted fate and stitched them down using a lightning stitch. I used a slight zigzag for the  rest of the seams and overlocked  the edges because I find with time that straight stitches tend to break.

Despite my expression on the photo I am happy with the finished top . What can I say but this top is great for us ladies who get high marks in the bust department ( if you know what I mean ) and the gentle pleats in the front make it quite comfy.  Once I adjust the cross over pieces after putting on the T they generally stay put( they are only attached at the sides , not on the neckline) . They do not feel binding like the photo suggests. The sleeves are firm fitting but not uncomfortable because the knit is soft and stretchy. I did elevate the neckline by an inch but apart from shortening the pattern from a dress to a top I did not alter the pattern.

And thus concludes my T shirt Project for now. Ciao !

Sunday 5 January 2014

The T-Shirt Project - Part 2. The Cross Your Eyes T . New

New Look 6405.

 The second of the Ts as a result of the T Shirt Marathon Project .
New Look 6405 combined with what I call the hypnotist* fabric or the I am going cross eyed fabric.
I have wanted to sew this pattern for a while - obviously quite a  long while because this pattern is 10 years old ( and here I thought I was sewing up a modern pattern and being trendy for a change )
Whatever - I really like the result .

I used some poly knit from the opshop , a scrap of red ribbed knit and to tart it up a bit and use up some of my BABLE ( Button Accumulation Beyond Life Expectancy )5 black buttons at the left neckline .
According to other reviews of this T shirt it is very close fitting and short so I went up one size and added 6 cm to the length after comparing the pattern pieces to my other Ts. Thankyou so much to people who do reviews of patterns otherwise I would have ended up with another fail .
I reckon the fit and length are just right . I like the little cap sleeves and high cross over style. It is a very easy project to sew as well.

Verdict- SUCCESS - complete. ( And I will definitely sew this pattern again ) .
(* I have an evil plan to wear this top   frequently thus hypnotizing my family into doing whatever , probably I will only end up tormenting them though. )


Saturday 4 January 2014

The T-Shirt Project - Part One . Burda Feb 2013.


One thing I really do need are T shirts - I have a sparse collection and all have stains or holes except one ( which is only about 15 years old ! )  so the situation was getting a little desperate hence the T shirt project  was born. And since I have fabric and patterns stashed I got the sewing machines buzzing .
I started with a popular pattern from Burda magazine  February 2013 - the gathered raglan sleeve top.
Fact- this is the only pattern I sewed in 2013 from a pattern dated 2013 !
Fact - I only bought one ready to wear top in 2013 - and it was exactly the same pattern as this , in blue !

This is a very easy pattern but I managed to muck it up by sewing the back of the sleeve to the front bodice piece . Simple  enough to unpick though.
I sewed a size 38 but it was too small through the abdomen area. I have sewed just shy of a dozen projects from Burda over the years and size 38 has always served me well so I think this pattern may run small. However it may also have been my fabric choice - a good quality cotton lycra knit but quite hefty so perhaps a lighter weight fabric would have worked better?? It did fit well around the arms and bust though  . I found the neckline gaped a bit even though I shortened the neck band as advised by others who have made this up. Finally I do not think the horizontal stripes are doing me any favours  .I did manage to match the stripes but in the completely opposite way !

Verdict - FAIL- sort of.  (  given to my eldest daughter who likes it , fits her better  and has worn it )

PS - The T-Shirt project also refers to a book called The Rosie Project - highly recommended if you want to read a laugh out loud book to cheer you up - it is also set in Melbourne- a little nostalgic bonus for me .

Wednesday 18 December 2013

Simplicity 9915- A Trip Down Memory lane.


Standing in front of our new rammed earth wall in our straw bale/ rammed earth home !

My favourite project of the year has been this little white top.
I was given this white/ off white seersucker . I had 1.5 metres ( 1.6 yards )  but is was only 90 cm ( 35 inches ) wide . I initially wanted to make a top along the lines of Louise Cutting`s Ebb design. In my dreams ! I was really short of fabric . Then I tried Simplicity 5683 because I have made it twice before and it doesn`t take much fabric. Again I was way off the mark. I was getting a bit desperate now because I had also set my heart on using  these 4 vintage buttons which in my mind matched my vintage fabric perfectly  .
So it was quite fitting that I found this vintage pattern which matched my fabric allowance .


 Simplicity 9915 - It is dated 1981 and dusting off my memories this is the third pattern I ever sewed . And it is also the most made pattern I own ( apart from PJs ) . I love this pattern but it has been well and truly over a decade since I visited it. I think I have made it at least 8 times using all views in fabrics from pink butterflies, black and white gingham , coloured dotted swiss cotton , terracotta silk and taupe dots.
Once I made the little bow tie version in fabric that Princess Diana had a shirt from ( hers was black and white and mine was red but it was the exact same pattern ! )


photo courtesy  from Diana`s jewels website  - photo taken in 1983.

This is also my best sewn version of this particular view. According to the pattern description it has a funnel neck line and shoulder tucks and getting those right was tricky- the shoulder tucks are adjacent to the neck line . Apart from that the top is simple . The big difference this time ( apart from 20-30 years literally ! ) was thread tracing the shoulder tuck marks . This then allowed absolute sewing accuracy and everything came together really nicely . Because there has been a fair bit of chocolate , cakes and three children since my teenage years I also  did not add the waist darts ! The top has simple dropped shoulders and has just the right amount of ease.

A close up of the neckline, shoulder tucks  , fantastic textured seersucker and my vintage buttons. 
 This top will go with just about everything and since my favourite handsewn  white tunic has bitten the dust this is a much needed replacement . I have worn it several times already and my friend`s daughter commented that it was just like a burda style pattern she had recently downloaded .
Have a good day , Janine.

Monday 16 December 2013

Butterick 4299 - More Remnant Stash Busting.

I told you that I really ran with the itty bitty remnant stash busting this year .
With only one ( holey ) windcheater and another ( even holier ) rugby top I really did need ( rather than my usual want ) a new windcheater.
I had a small piece of  french terry type fabric - only 80cm but very wide  - and a smaller  scrap of pale blue fleece fabric . Just enough to eek out my new windcheater. I used some piping type trim to cover the arm seams and make look like a ` design feature ` .


I used Butterick 4299 - a very OOP `Lifestyle Wardrobe ` pattern . As with all raglan sleeved garments this was a very easy sew. However I am not happy with the upper sleeves - they are quite voluminous . I have saved one of my daughter`s discarded raglan sleeved windcheater and one day ( those famous well intentioned words ) I will unpick this and compare the pattern pieces.
This is a very unexciting garment but I sew for  my real life and not my imagined life - so no pretty garden party dresses ( at least for now ) . This top has been worn heaps already.

I did sew some more itty bitty remnant stash busting projects but if you  get my drift I will not be posting photos. However I will say they are more comfortable than RTW and stay up ( a bonus !) . I will also say sewing un-die grun-dies are harder than they look .

This just about covers my remnant sewing for now . Cheers Janine.

Tuesday 10 December 2013

Kwik Sew 2694 -Happy Families.

Continuing on from my small remnants stash buster I sewed another Kwik Sew 2694.

I love the grey and black print knit left over from making a totoro hat .What you don`t know what a totoro hat is ? Let me explain . On my eldest DD`s last day of school in 2012 she wanted to dress up as totoro - a Japanese anime comic  character . We needed dark grey fabric and the reverse side of this fabric was the closest we could find in the one and only fabric shop in town ( well I did have some dark grey/silver/ black shot dupioni look silk in my stash but I am not that nice a mother ) . So I only had 50cm of this minus all the hat pieces already cut out - that is not much fabric at all !
Hence Kwik Sew 2694 was about my best option . I combined the print with black bamboo knit ( I love this fabric too! ) remnant from Cleggs famous Boxing Day Remnants Sale . That event is a whole nother story as well - imagine scores of women three deep rumaging through a long table covered in 100s of remnants.  I lived to tell the tale and scored this beautiful knit - it is so soft . Once I pawed this I did not let go !
Truth be told I have probably overdone this pattern. This is now my fourth rendition .

Nuclear Happy Family of Kwik Sew 2694 
This pattern is still available and it is easy and a little more interesting than a plain Tee and it has certainly allowed me to make the most of remnants stash.
Here`s to happy healthy families.
PS I would love to show a photo of totoro daughter but she would probably kill me.

Sunday 1 December 2013

Tee for Two or Three ?

I have been informally sewing along with a group of ` Stashbusters `this year  . Each month was a different theme and February`s was using small pieces of fabric . I embraced this idea and ran with throughout February and then just kept on going .

I started with sewing two T shirts using four pieces of fabric that has been festering in my stash for years .


Using Simplicity 7692 - a very old basic T shirt pattern I slashed, cut and re- taped the pattern to recreate the above tops. 
Top one has an asymmetrical neckline with a matching asymmetrical two pieced front. I used three pieces of material to complete it - a small remnant of maple leaf print poly knit in the colours of navy, black, teal, violet  and  gray and matching teal mesh and navy cotton lycra . There was not much of the maple leaf print left and I absolutely loved it . I was determined to use it but it did take some thought on what to do . This project was certainly stretching my creative side and in the flush of success - yes I can do something a little different ! - I went and melted the top of the front while ironing it -duh . ( Oh well it was just going to be a wear around the house top anyway ) 


 Top two is a shameless knockoff of a vogue pattern released last year I think. Well it is just a variation of a simple T and for $25 plus for a vogue pattern  why not? I used a remnant knit of a blue/black/ gray/ white stripey soft knit  given to me from Mum and the remainder of the navy cotton lycra from Top one. Again there was not much of the stripey knit so some care was required.  I also took more care with the ironing !

This was a fun project. Using an old pattern and remnants ( the exception being the navy cotton lycra ) I had nothing to lose so I just kind of went for it . I ended up with two wearable tops from fabric too small to do anything else with. I would recommend others to have a go at this as well. 

And then as mentioned I kept on going with the remnant stashbusting . I sewed more short PJ bottoms for my middle daughter using material left over from her Kwiksew circle skirt. And then I made another Kwik Sew top from more remnants but that can be another blogpost for another day. 

Saturday 4 May 2013

Happy 80th Birthday Mum! -- New Look 6009 Top.


After doing a suck-up - I mean some sewing for  my MIL I needed to be fair and do the same for  my own Mum. She has just turned 80 years young and still sews most days - most of her own clothes and  patchwork and machine embroidered quilts. She can also do that thing with knitting where she knits really fast without even looking and doesn`t make a mistake - totally jealous and hate that but then again I am not a knitter so there.

Just when I was wondering what am I going to make Mum this year  I found 3.6 metres of Thai hand woven  silk in the op shop for $8.00!  In a background colour of mauvey, browny I don`t know what with blue and brown diamonds it was perfect . Talk about lucky - I just wish I could find that winning tattslotto ticket .

So I nicked - well borrowed - a pattern from my Mum`s stash - which is only fair really since it was for her ( and I promise I gave it back too - except I might nick it again to sew up for me ) -New Look 6009.
It is a simple drop shouldered top . The cute part of this pattern is the keyhole in the front with a loop of fabric above which gathers the  material into a sort of a bow look. The back is done up with one button / loop  .


It is a REALLY easy pattern - with only the front , back and facing pieces and a small rectangle for the loop.
The only tricky bit was because I used fabric with such an obvious pattern it just took a bit of  care to match the diamonds . I found some matching bias binding to finish the facings and a cool vintage button for the back from  my stash ( bummer that I only had one ) .


End result - one happy Mum who loves receiving ( and giving ) home made gifts. ( And the other best bit is that there is heaps of material left over for me .)

As Jen S said in her blog - yesterday was sewing group. One lady was doing a toile for a red lace dress for a wedding, someone else was sewing a self drafted dress , another was completing a chanel style jacket  impeccably  fitted mind you, another perfecting a toile for a shirt which already looked  well  perfect , another was making a lined coat , Jen cut out her houndstooth jacket and what was I sewing - a plastic fold up shopping bag - I am all class I tell you. Our new group is called From Tshirts to Couture - but perhaps it could be changed from plastic bags to couture :)  .

Cheers . Janine.

Sunday 14 April 2013

The Ultimate 61 Year Old Stash Bust.

Hello there . I have been debating do I , do I not ?  Not sewing of course but blogging. Without sewing I would probably be locked or hidden away in a small dark place( Ha Ha this probably describes my sewing room anyway ) . But then I read another blog about blogging for herself  , a kind of sewing diary and I thought exactly so.


I have been informally sewing along with other stash busters and this I believe must be the ultimate in stash busting. This fabric has been in a cupboard for 61 years ! Not mine , I`m not that  old  thanks ! I will make a long story short , my mother -in-law has a friend who apparently has a lot of fabric and was thinking about giving it away . Well in a nutshell she is not quite ready to let go ( yet - I still have hope ) but this led to my MIL telling me about the time she pleaded with her mother to buy her some fabric to sew when she was 17. Her mother did so with the promise she must actually sew it -hmm fast forward 61 years .

After a good and gentle ( and a lot of trepidation ) hand wash the fabric came up pretty well. There was one small stain and a few moth holes but pretty good for being a senior( heck I hope I am that good at 61 myself ) . My MIL wanted a kimono style  robe so I used New Look 6928 - a unisex pattern for sleepwear . I have made the robe once before - size Small and it is huge but very simple to construct  . I had just enough fabric - 3 1/2 metres at 90 cm wide. I managed to avoid the worst patch of moth holes but could not avoid the stain . There wasn`t even enough fabric left to make even one pocket. The fabric was lovely to sew with and ironed beautifully ( it wrinkled beautifully too ) . It was marked in one spot on the selvage  -Anglosheen -British fabrics- and I wish I knew more about it  .

Well my MIL is very pleased and says her mother will be looking down at her from Heaven happy as well. I should have offered to sew this up 20 years ago when I first started going out with her son ( not that I knew about the material until this year )because I think my approval rating has gone up a couple of notches  .

Cheers Janine.

PS I am soooo enjoying The Great British Sewing Bee. I don`t think the smile left my face the whole time watching it.

Sunday 20 January 2013

Knipmode - The $2.50 Op Shop Michael Kors Skirt


Michael Kors would be rolling around in his  NY penthouse suite or Monaco Yacht or where-ever he hangs out to think us sewists could make up one of his skirts for only $2.50 but isn`t that one of the reasons we sew ? 

Sewing this skirt ticks lots of boxes for me .
1.  I finally got to use of of my Knipmode magazines. This skirt pattern comes from the supplement to May 2012 `s edition. The supplement was only for skirt designs. 
2. I used an old stash fabric - this has been maturing for at least 6 years . It is a turquoise light weight linen . It was so easy to sew with and the colour alone made me feel good . And it was only $2.50 .  Luckily I still have a remnant leftover  .
3.I finally got to try out bound buttonholes and mitred hem corners . 

The skirt is unusual but simple in design - It has a slanted side on the left to  which is attached a long rectangle . Then buttons are added to this same side to create the unstructed pleats. 


My first bound buttonholes . The buttons are sewn on the inside of the skirt.
Knipmodes are dutch sewing magazines . For any Australian readers who are interested I bought mine from Crafty Mamas and as a bonus there is free postage .  I  started to use google translate but it is quite a slow process. I did a little research to find that like other pattern magazines there are no seam or hem allowances. 
After that I sewed the skirt by instinct because it really is a simple skirt. 
The steps I followed are -
1. stitch darts in the front and back. 
2. sewed up the back skirt pieces . 
3. added the zip. 
4. sewed the front and back skirt pieces together. 
5. sewed the front and back waist facing pieces together ( after interfacing them ) 
5. sewed this to the skirt then trimmed , snipped and understitched  the facing. 
6. added a bias binding trim to the waist facing and handstitched this to the zip area. 
7. measured out my rectangle piece needed and attached this to the skirt front and back. 
8. sewed the hems (  by hand except the mitred corners ) 
8. made bound buttonholes and attached the buttons.
  
Now why was this skirt only $2.50 ? 
Well the fabric was only $2.50 from the opshop and I only used about three quarters of it so say $1.70. 
The buttons were also from the op-shop - $0.50 and finally the zip  came from the op-shop as well  - they were three for one dollar so about $0.30 . ( I did try to buy a zip new but there were no zips that even came close to the colour of my skirt . I walked a few doors down to the oppie  and found a really close match and it was Australian made !) 

Finally channelling my inner Angelina Jolie ( and by inner I  mean really really inner. ) 

Cheers Janine. 
PS Jane I tried to find another photo of this skirt but all I have is  the photo from the magazine. 

Monday 31 December 2012

Not Backwards about being Forward - Welcome 2013.

I have enjoyed reading everyone`s sewing reflections and their sewing hopes for 2013.
It seems that although we greatly differ in styles and productivity everyone seemed to enjoy their own sewing challenges and grew in the process. I do think the internet contributes to this a lot-we learn and are inspired by others .


New sewing project.

My sewing statistics were less in previous years because my sewing challenge was to slow down, enjoy the process more , do my personal best  and try new techniques . Therefore although I only sewed 13 items for myself in 2012 I am more than happy with this. I  do not need more clothes but I still want to sew.

Overall I sewed  27 items for the year - 14 for others - mostly my daughters but also my husband and mother-in-law. I sewed 11 new patterns a couple of which I then repeated later on. For my family the fabrics were purchased specifically for their projects   but for myself  I used all stash fabric so my stash is just a tad   smaller than last year - not that my sewing room looks any less cluttered  :)  .

My new challenges and techniques I accomplished this year were learning to confidently deal with chiffon ( If only this could extend to dogs and family and significant others !) , using flat fell seaming including on long sleeves, using french seams in armholes  and making changes to patterns to improve them or suit our needs more. I also finally got around to sewing that handbag pattern that had been glaring at me for probably 8 years. I did not blog about a few projects including a secret Xmas shirt for my husband - he initially thought it was a RTW one and  was very touched by his homemade present  ( which warmed the cockles of my heart ).

So now it is a new year and a new sewing challenge  -

yes that is my cutting table .

I have finally cut out my knipmode skirt - I bought three  magazines back in July 2012 and have been looking forward to attempting this pattern which is from the skirt supplement of the May edition . It is a Michael Kors design knockoff and I have taken a picture to show the  unusual shaped pieces. The above picture shows the skirt front at the  top and the skirt back pieces below. There are also the waist facing pieces and a long narrow rectangle ( which I have not cut out yet ) .
This project will be a challenge for me in several ways and so what better way to start a new year .
It will be a totally different fashion style to what I am used to , the magazine is written in dutch ( and now I know where  the term  It is all Double Dutch comes from ) and I am going to try bound buttonholes and possibly mitred corners. There now I have done it - it is written down in black and white and I can not back away. Wish me good luck.

I look forward to continuing to reading everyone`s sewing blogs in 2013 . I also look forward to hopefully a happy, healthy , safe , interesting and varied  year. Cheers Janine.

Sunday 30 December 2012

Kwik Sew 3637 A Circle Skirt and Farewell 2012.

I have managed to complete the final project for 2012 - a  little thrill that I can start 2013 all afresh . My middle daughter did not forget about the promised skirt she requested that I sew her. So ta da - here it is - in all its live modelled glory -yes my daughter agreed to have this photo taken ( after my youngest tricked her and took a photo anyway !)


I used Kwik Sew 3637 , a yoked circle skirt . The fabric is a Japanese cotton lawn from Spotlight - it actually has  a nice hand and is reminiscent of Liberty but without the accompanying $40/metre  price tag. ( I mean it is not as good as Liberty but still a really good substitute ) .Bonus my fabric was on special for only $7.99/metre and there were lots of patterns and colours to choose from   .


The skirt was really simple to sew -it only has two pieces - a yoke- cut out four times  and skirt piece- cut twice .     I did make a couple of  small  changes . I lined the skirt with dark blue cotton voile and surprisingly I found some navy blue ready made piping in my stash which added a nice little touch to the yoke. The only tricky bit of the skirt is the zipper and managing the lining and piping in this area . Also I overlocked the lower edge of the skirt and then made a narrow machine hem .   It does take alot of fabric  - size small uses 2.75 metres  but the resulting  softly cascading folds of fabric look lovely on her .


Well now I am truly ready to start sewing for me again - my pattern is traced  and fabric washed and ironed all ready to go for next year . To everyone have a  Happy New Year . Cheers Janine.

Saturday 22 December 2012

Santa Claus Is Coming to Town.


For a few years now my youngest daughter has pointed out to me that her christmas stocking is somewhat smaller than her two older sisters and I have been able to ignore these mutterings. However as she gets older  it also gets harder for me to put this aside and so finally I decided to correct this injustice.
I bought a chrismassy panel from a local patchwork shop and then trawled my stash to complete the sack. I used some cheap and nasty  dark green and white spotty  patchwork fabric that I have had for at least 16 years for the back and some much nicer vintage red and cream gingham cotton  to line it  and I couldn`t believe it but I found that I already owned a suitable christmassy panel ! ( SewYears Resolution - shop my stash before buying anything else )
Then because it is the silly season I went to town decorating it - using all materials from my bits and bobs box - glitter paint, fluffy sparkly pom poms, gold iron-on motifs, `toy` buttons and charms , lone gilt buttons and little bells rescued from the necks of chocolate Easter bunnies.
Now I hope it doesn`t matter that  this is not a stocking and that this is now much larger than my other daugther`s stockings otherwise I will get to practice my diplomacy skills AGAIN .

With the completion of this ( downright quick and easy ) project my Christmas preparations are done. Presents have been bought, cooked ,sewn and wrapped. The Christmas cake has been baked ( and eaten !) , the tree has been decorated and my daughters are cooking the desserts we need to take for the day. Now I get to sit back and relax and hopefully get to read Anna Karenina and watch the Carols by Candlelight.


Hope you and your families  all have a safe and happy and healthy  Christmas.
I also want to thank everyone for their kind words and awards even during the year. It has made blogging even more fun and enjoyable.
Cheers Janine.

Tuesday 4 December 2012

Burda 7372 - A Spotty Dotty Circle Dress.


Bonjour!  This is the second of my projects for my middle DD using some cotton voile from Spotlight ( actually quite alot of cotton voile - four metres !) . The dress has quite a slim fitting bodice which merges into a large waist and a  circle skirt  . It is has a small mandarin collar, decorative only pocket flaps, inseam pockets  and bias bound armholes.  I used size 12 which is for a bust of 93 cm and the finished garment is only 97 cm so you can see there is not much ease at that particular point. However the waist is huge and shaping is provided by elastic .

This pattern uses four metres or 4 3/8 yards of fabric because of the skirt portion which is  a gathered  circle skirt . If you sew this, take my advice and cut out the skirt portions first - I didn`t and almost didn`t have enough fabric . In the end my daughter wanted me to shorten the skirt by about 13 cms so I went through all that angst for nothing . The  other changes were that  I cut out two yokes so it could be lined. I realise that my old cotton shirts always fade first at my upper back which led to a  totally useless thought that perhaps that is the purpose of  lined yokes .
Also I eliminated the outer fabric  casing where  elastic joined  to a narrow  fabric tie is threaded . Instead I made a channel in the waist / bodice seam and inserted elastic in there before sewing on the front bands. My daughter didn`t want the fabric ties but instead will wear this with a belt .

 A close up of the bodice, flaps, lined yoke and bias bound  armholes.

So now my daughter can be all swirly and girly in her spotty dotty dress but unfortunately she just won`t do that for this blog !

Now I admit I am excited . You see I have not sewn anything pour moi in two months - I am going through serious selfish  sewing DTs so once I finish up some PJ pants for my eldest DD I will get going with a skirt which is just a little bit different to the usual. My middle DD also wanted me to sew her a skirt but I think I will just keep quiet for now and not remind her about that ;) .

Cheers Janine.

Wednesday 31 October 2012

Kwik Sew 3854- Sailor Star Shorts


As I sit here safe and snug in my home I admit it doesn`t feel right to be writing something as trivial as a sewing post so I am sending all my wishes to those who are being affected by Hurricane Sandy that all will be safe but according to the live new reports it is certainly going to be a terrible event.

My middle daughter did not want to buy any new clothes this summer instead she wanted me to sew her a pair of shorts and a dress and I can now tick one off the list.
She wanted a vintage feel to her shorts and something a bit different. After a marathon trip to Spotlight and searching literally every pattern catalogue she chose Kwik Sew 3854  and navy blue twill printed with white stars .


Trying to live by my motto of RRR - Reduce, Recycle and Reuse we went through my stash and she found a remnant of soft cotton - maroon /navy houndstooth and six gold buttons from a previous 90s project ( when gold buttons were all the rage ).
I thought I was so clever to be able to cut out the side and back waist band pieces and pocket pieces as she wanted from the remnant . I thought I had been careful in tracing out all the pattern pieces but  it  seems my skills in counting are as good as my talents in trying to persuade my middle DD to model the shorts. I had not cut out the main pocket piece that is on show and I did not have enough fabric left to cut them. My daughter looked crestfallen and wanted me to start all over again. Luckily I had just enough fabric to cut bias strips to sew along the pocket opening edge  and she was happy with that - phew - I admit I can be a bit lazy in some ways.


The shorts open by the flap in the front unlike your usual pants.
As per usual the Kwik Sew instructions were excellent = clear and concise with good diagrams. They clearly explain about understitching and the correct procedure for trimming seams. The only things I did differently were to sew the side seams last to get in an extra fitting opportunity and finished the waist bands with some satin bias binding. I also managed to sew up the gap at the front flap/ inner pockets more than suggested because my daughter could easily get the shorts on .

Another inner shot .

Overall these are a cute pair of shorts and I would recommend this pattern . Another bonus is they don`t take much fabric at all so they were alot cheaper than buying any RTW pair. At the end of the day my daughter is happy she got the unique pair she wanted. Now hopefully she will like the dress to come.  Stay Safe . Cheers Janine.

Sunday 7 October 2012

A Touch of Lace Top - Burda WOF 04/05- 106.


I have been loving the lace trend and in the past have had some lace shirts/tops which I  adored  but are long gone. I was going to buy some lace but then remembered that I had a small remnant left over from a lined lace dress my oldest daughter sewed about 3 years ago - sometimes  my stash surprises even me . I also love white shirts - they are my most used and practical garments but I like them to be a little different and interesting rather than just plain. So enter .......

This Burda model looks so self assured, relaxed and chic - of course I want to sew this.


Burda WOF - Pattern 106 from April 2005 - one I have been wanting to make since well 2005 . It is a dropped shoulder almost kimono looking top with a waist band  . I used a scrap of white soft poly to interline the lace pieces . The main part of the top was cut from a fabric which looks like a light weight silk dupioni  . The top was easy to construct but I did not completely follow the instructions because they made the sewing the top harder than it should be . I only sewed up the side seams once I had completely constructed the top and then added the waist band.


The lace panel continues around the back and I added lace to the arm bands.
Overall this is a terrific little pattern - really great for using small pieces of scrap  fabric and the main part of the top took only 70cm  . I am thinking of trying this pattern again using some scraps of satin and experimenting with colour blocking but who know when that will happen - probably when that trend has totally passed and looks out of place :).

But for now my middle DD has announced that she does want to buy any new summer clothes but wants to me to sew her a pair of shorts and a dress - patterns and fabric have been chosen after a marathon 2 hour trip to Spotlight - I am sure this will keep me out of trouble for a while.
Cheers Janine.

Wednesday 26 September 2012

Simplicity 5197 - Embellished Tunic.


 I  have been sewing in dribs and drabs and finished up this tunic a couple of weeks ago. I have managed to wear this a few times now even though my sewing is topsy turvy - sewing a winter tunic when the weather is definitely warming up - blame it on hormones or whatever good excuse us females have.


Pattern - Simplicity 5197 - dated 2004 . A simple and plain tunic with side splits and sleeve, collar and neckline variations. I have used this once before just as is - using the V neck view with a collar and 3/4 sleeves with the split - no changes at all.
This time I wanted to be a little more ` creative` inspired by so many other bloggers .

Material - crinkled semi-sheer georgette - I love the rich rust coloured swirls on the black background .

I made several changes to the pattern - I reversed the front neck line facing so it is  on  the outside instead of inside and used a contrasting scrap of black satin. I then embellished this facing - hand stitched some narrow black ribbed trim to the outer edge and then using a simple cross stitch and machine embroidery thread stitched over the trim. I thought about adding another fancy stitch using bronze metallic thread but this seemed too much but it still wasn`t quite right so I added three bronzed looking buttons down the front. I also lengthened and flared the sleeves so they could be full length and elasticised. I used french seams everywhere including the sleeves. Talking about french seams on the sleeves - I googled this and alot  of the sites said it can`t be done. The other sites said it is really easy ! Well I had nothing to lose ( except lots of unpicking and narrower seams )  so I gave it a try and it all worked out fine .


Here is a close up the neck line - the satin looks a little puckered but I am loving this tunic so it just doesn`t matter.

I would highly recommend this pattern - it is a relaxed fit without being too voluminous and there are so many different design possibilities. It is also very simple to sew . I am sure I will be making this one again.

Happy Sewing , Cheers Janine.

Sunday 16 September 2012

Our Garden

I am excited to be moving in the next few months to a new house but I will miss my garden ( but not all the hard work ) . My garden is just starting to come to life with spring and I wanted to capture some memories so I can look back at all the plants and design that took some 16 years in the making .

A mish mash of bulbs - the upright bulbs came from my beloved Aunty Pearl`s garden and she has been gone for some 30 years .


Magnolias are amongst my favourite trees - I will definitely plant some in my new garden but it will take a long time before it looks like this. There is a self sown echium off to  the left. I also really love maples and viburnums. I love dogwoods too and planted a genuine Canadian Dogwood but our harsh Australian summers were just too much and it curled up its toes .Living on tank water I can not afford to water too many plants here - they have to be drought resistant and tough .

 
This is a part of my Japanese inspired garden. I have divided my garden into `rooms` - there is the native section, a woodland garden ( with small fairy statues hidden - I must try to find them before we leave ) , the japanese garden, a perennial section , herb garden, citrus area  and `secret` garden ( it has a pergola with a seat underneath - concealed by lots of climbers and shrubs and looks toward the valley and mountains to the south ) . The gardens all blend into each other.


This is a part of my perennial garden which is only just starting to bloom. I love the smell of wall flowers - like Johnsons Baby Powder and they must be the easiest plants to grow from cuttings. I also have lots of salvias , some lavenders , lilies , catmints, penstemons  and irises here. I tend to love pinks , purples and whites with small splashes of red and yellow .

 This is the herb garden - I have parsley, spring onions, pizza thyme ( I like the flavour  better than common thyme, ) varigated oregano, a spindly savory bush , curry plant , chives, garlic chives , a potted bay tree, a so called dwarf rosemary bush ( hah ! dwarf if you regularly prune it ! ) and a moroccan mint ( sweeter than common mint and not invasive at all ). There are sporadic cat mints as a border and self seeded feverfews and some decorative roses  ( although I have toyed with the idea of making rose petal jam ).

My Irises and the main rose garden ( and the good old washing line )  - the irises are starting to come out. Again irises are one of my favourite plants - they give so much for little return. I am torn about my roses - most of them I have obtained by cuttings or gifts . However everytime I go near them they spike me- should I take cuttings or do I just leave them. Off the side is a  part of the native garden - mainly indigenous natives but there a couple of ring- ins as well.

Well this is just a portion of my garden. I really bit off more than I could chew in making it .
Hope everyone is having a good day.
Cheers Janine.

Sunday 19 August 2012

Sewing Curved Pockets.


I have been sewing the dress  Burda 7808 which I sewed in January this year. I was very impressed with the comfort of this dress during really horrible hot days and wanted to have another one as one dress like this is not enough for our Australian summers ( although why I am sewing it now when the hot weather is a long way off I really do not know ! )


 I am sewing the version with a collar, contrast front inset and adding the pockets. The pockets are curved with some slight gathering at the top. The instructions say to fold over the seam allowance of the pocket and baste. This is not so easy when the pocket is curved. Years ago I read this so simple tip to help with sewing curved edges. I have simply sewn a large gathering stitch around the edges of the pocket within the seam allowance. The threads are pulled gently gathering the pockets. The gathers are then adjusted to form a nice curved pocket. When you are happy , pin in place and then give the pocket a good iron. So easy and simple. I do wish the pattern companies would add in these extra little steps to help us sew better .
Cheers Janine.